
Anime Crusaders X Team Builds: Damage, Farms and Support
Build a team around the attacker you want to develop, then add the economy, buffs and Flying coverage it needs. Twenty One provides a beginner damage core; your remaining slots should solve the demands of the stage.
With all six normal slots unlocked and the units available, use Twenty One, Loid, AI (Idol), Speedcart, Useless Goddess and Phoenix (Rebirth). Replace Phoenix with Goju VS Sukuno if needed, then reassess Flying coverage. Match Useless Goddess to Magic attackers or Mr. Champion to Physical attackers. Speedcart costs 550 Yen to deploy; Loid and AI (Idol) cost 800 Yen each. For stronger Flying damage, use a Hill attacker or place a Hybrid attacker on a Hill.
Choose a core and cover its needs
Choose your main attacker before filling the other slots. Build around its damage type, deployment cost and coverage, then adjust the supporting units for the stage.
- Damage core: Concentrate early development on an attacker that can hold the opening waves. Twenty One costs 1,300 Yen to deploy and receives Crusader through her passive.
- Economy: Reserve slots for farms when the stage gives you time to develop them. Their deployment and upgrade spending must leave enough Yen to defend.
- Damage support: Match the buffer to the attackers you intend to strengthen, and keep those attackers inside its range.
- Range and control: Add range support when placement limits coverage. Use control when enemies move through your damage area too quickly.
- Flying coverage: Check placement types before committing the remaining slots to Ground attackers and economy.
For a control slot, Puci (Made in Heaven) combines three-second attack stuns with Inescapable Frame. The latter freezes enemies within range for 1.5 seconds every 10 seconds and doubles the damage they take from all sources, with a 10-second cooldown per enemy. This makes him useful when several attackers can capitalize on the same damage window.
For a Physical core, Akuzo VS Renkuro supplies another form of support: a non-stacking debuff that increases damage received from Physical Type units by 15% for 10 seconds. Choose that interaction when your main damage dealers can exploit it.
Prioritize units that fit the stage's budget and your existing support. Goju VS Sukuno is an evolved damage target and a replacement option in the beginner composition below. Reserve expensive Vegito builds for very long content; everyday teams benefit from developing affordable damage and their supporting roles first.
A Twenty One beginner team
Use this six-unit loadout once you own its members and have unlocked enough normal unit slots.
| Unit | Team role |
|---|---|
| Twenty One | Main damage |
| Loid | Farm |
| AI (Idol) | Buff; economy-oriented slot |
| Speedcart | Farm |
| Useless Goddess | Magic damage support |
| Phoenix (Rebirth) | Magic damage; summons |
Twenty One is a Ground unit with Magic and Blossom types. Her passives guarantee Crusader and add Physical Type damage to her attacks. Useless Goddess supports the Magic core, while Phoenix (Rebirth) adds another Magic attacker and summons that can attack Flying enemies.
Equip the loadout
- Open Units, select Twenty One in Collection, and press Equip.
- Search for and equip Loid, AI (Idol) and Speedcart.
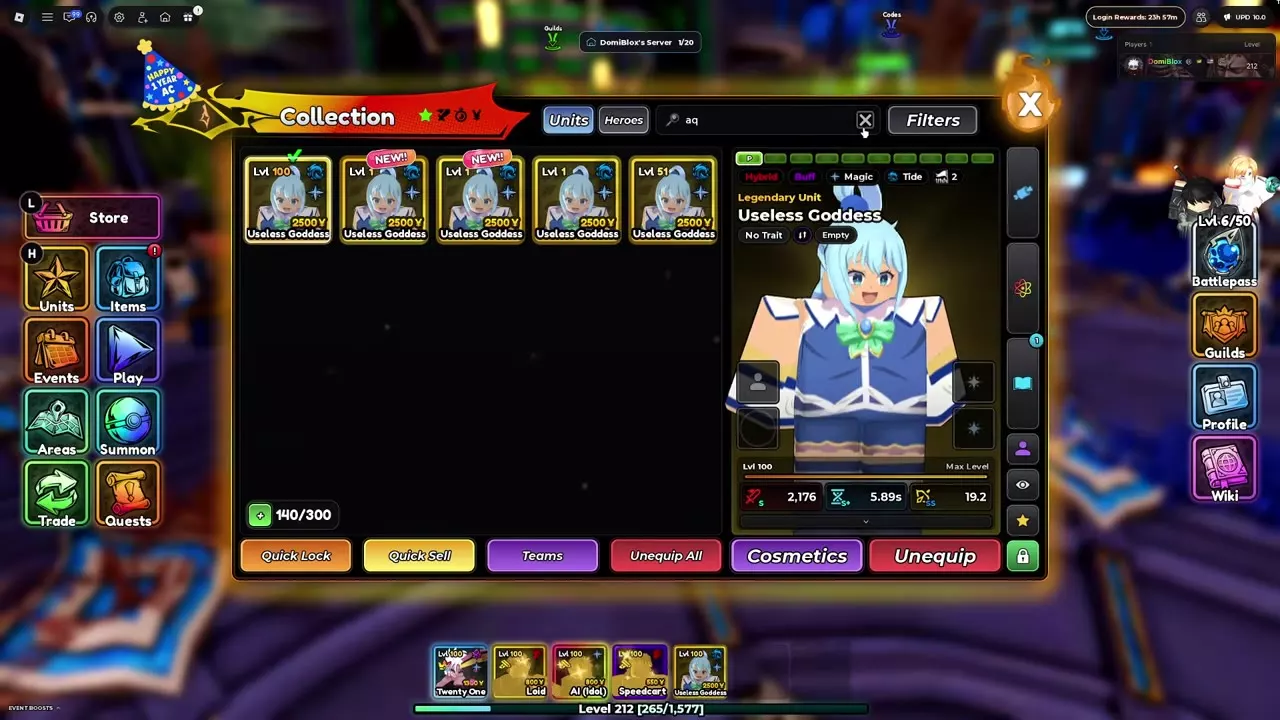
- Equip Useless Goddess. In battle, place her so Twenty One and your other Magic attackers stay within her range.
- Equip Phoenix (Rebirth) in the remaining slot.
- Review the stage's Flying threats and adjust the team if its coverage needs a stronger Hill or Hybrid attacker.
If Phoenix (Rebirth) is unavailable, use another damage unit from your collection; Goju VS Sukuno is a named alternative. That swap changes the team's coverage, so account for the Flying role Phoenix's summons supplied. Phoenix and Phoenix (Rebirth) are separate forms; this loadout calls for Rebirth.
Start smaller with fewer slots
An early three-unit lineup uses Twenty One, Vejita (Majin) and Ureo, with Ureo filling the Hill role. A five-unit progression example adds Ayzen and Speedcart. Build toward the six-unit composition as your slots and collection expand, while preserving an opening defender and Flying coverage.
Budget farm placements
| Unit | Deployment | Role | Check relic |
|---|---|---|---|
| Speedcart | 550 Yen | Farm | Compatible |
| Loid | 800 Yen | Farm | Compatible |
| AI (Idol) | 800 Yen | Buff | Incompatible |
Speedcart has the lowest deployment cost of these three choices. Use that lower entry cost when your opening budget must cover both defense and an early farm. Loid adds another Farm option. AI (Idol) fills the third economy-oriented slot in the Twenty One composition, while retaining her Buff role. The in-game Wiki's Overall ranking places AI (Idol) in Meta Support.
Establish enough defense to survive the opening waves, deploy farms early, then invest in their upgrades before funding expensive attackers. The full three-slot allocation suits a team with enough damage from its remaining slots; with fewer slots, preserve the attacker and coverage needed to survive.
Speedcart upgrade example
These values belong to an example farm setup. Each cost purchases the next upgrade shown.
| Current upgrade | Current farm value | Next upgrade cost | Next farm value |
|---|---|---|---|
| Upgrade 0 | 240 Yen | 1,000 Yen | 600 Yen |
| Upgrade 1 | 600 Yen | 1,750 Yen | 1,200 Yen |
| Upgrade 2 | 1,200 Yen | 2,500 Yen | 2,100 Yen |
Use the next upgrade's cost to decide whether defense can safely wait. A higher farm value helps fund later spending, but buying the upgrade also delays the next attacker or combat upgrade.
Check can be equipped to Loid and Speedcart. Equipping it to AI (Idol) returns Damage types don't match. Match equipment to the individual unit; see the relic directory for equipment choices and compatibility.
Match Physical, Magic and range support
Choose a damage aura for your main attackers, or choose range support when reaching the lane is the more pressing problem.
| Support | Main benefit | Recipient |
|---|---|---|
| Useless Goddess | +10–100% damage | Magic; within range |
| Mr. Champion | +10–100% damage | Physical; within range |
| Mastermind | +25% Range | Self; units within range |
| Zero (True Emperor) | Chess-piece bonuses | Assigned units |
| Kisoka (Strategist) | +30% Range hat | Selected unit |
Match the damage aura
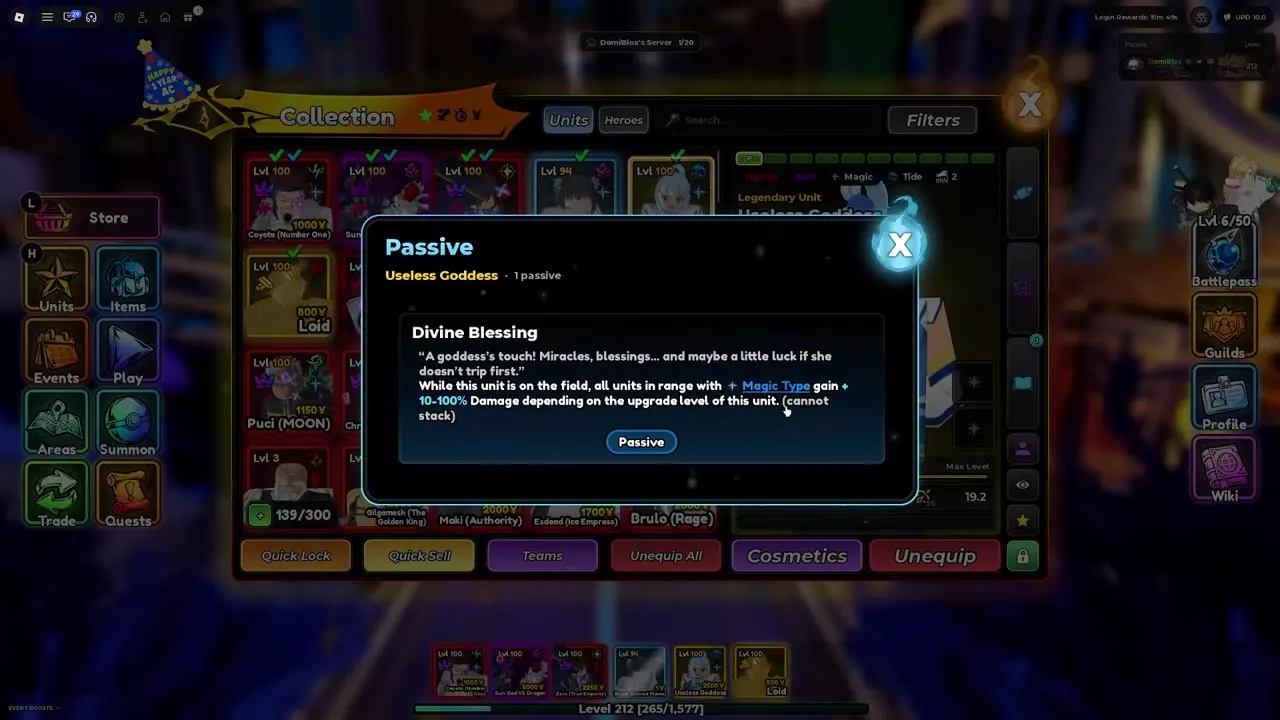
Use Useless Goddess for a Twenty One Magic core. Divine Blessing increases the damage of Magic Type units within her range by 10–100%, depending on Useless Goddess's upgrade level.
Use Mr. Champion for Eskanoor or another Physical core. World Champion's Aura gives Physical Type units within range the same 10–100% progression according to Mr. Champion's upgrades. The in-game Wiki's Overall ranking places Mr. Champion in Meta Support.
Each aura is non-stacking. Upgrade the matching support and maintain coverage instead of placing duplicate copies to multiply the same aura. Both supports cost 2,500 Yen to deploy, so establish your opening defense before committing that budget.
Choose broad or targeted range
Mastermind costs 1,000 Yen to deploy. The Puppeteer gives him and every unit within his range +25% Range. Choose him when several nearby attackers need wider coverage.
Zero (True Emperor) is useful when different attackers need different bonuses. His Crown of Rebellion also grants units within range a non-stacking +10% damage aura.
| Piece | Damage | Range | Cooldown |
|---|---|---|---|
| Queen | — | +20% | −10% |
| Knight | +20% | — | — |
| Pawn | +5% | +5% | −5% |
Give Queen to an attacker constrained by range or cooldown, and Knight to a damage priority. A unit can hold two pieces; assigning a third replaces its first piece. Reassignment has a 60-second cooldown. After its receiver earns 50 kills, Pawn promotes to Queen for 15 seconds if that unit does not already hold Queen.
Kisoka (Strategist) provides a stronger targeted range bonus through Uruhara's Hat. He earns one Candy per attack and unlocks the hat at 50 Candy; its selected recipient receives +30% Range. Uruhara's Gamble tosses a coin every 30 seconds. Heads grants units within Kisoka's range a non-stacking +25% Range for 30 seconds; tails has no effect. Choose the hat for a specific carry, and treat the coin effect as a conditional bonus.
Cover Flying enemies
Against Flying enemies, placement type changes the damage dealt under the Anniversary combat rules.
| Attacker placement | Damage against Flying |
|---|---|
| Ground | 33.3% |
| Hybrid | 66.6% |
| Hybrid on a Hill | 100% |
| Hill | 150% |
Ground attackers deal reduced damage to Flying enemies. A Ground-heavy team therefore needs enough damage to overcome that reduction or a slot dedicated to stronger Flying coverage. Place a Hybrid attacker on a Hill to raise its multiplier from 66.6% to 100%, or choose a Hill attacker for the 150% multiplier.
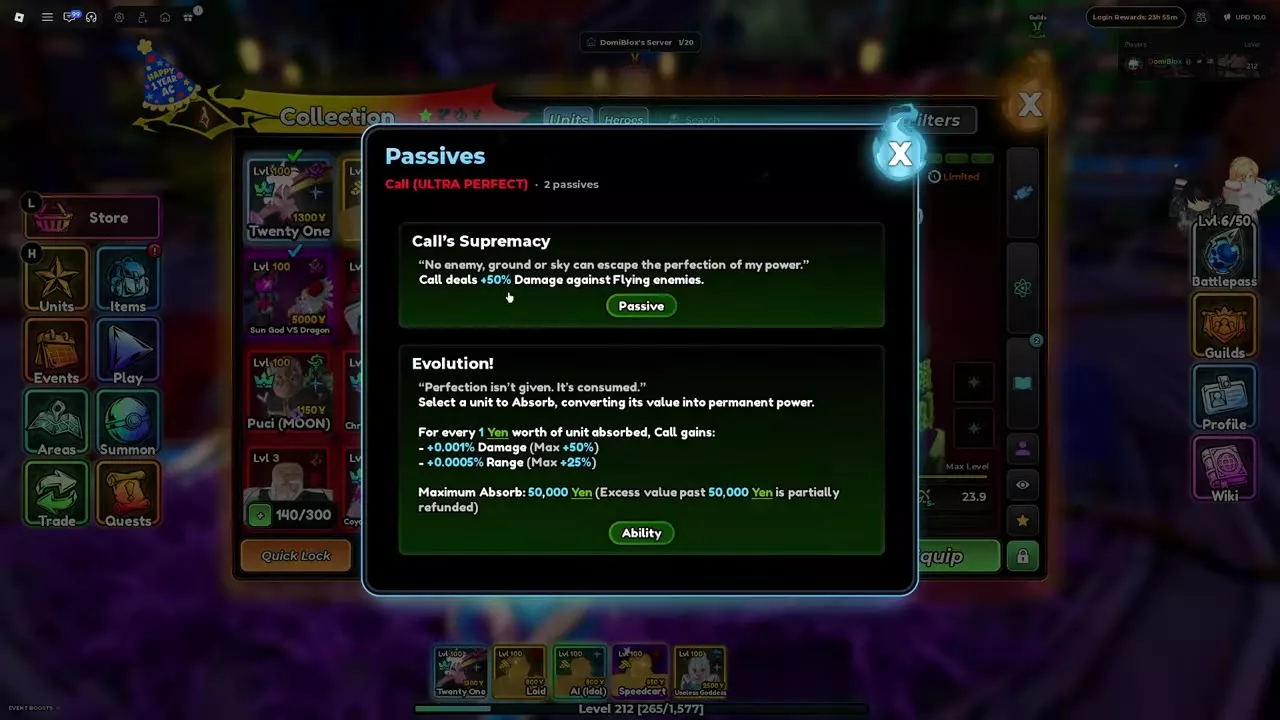
- Call (ULTRA PERFECT): A Hill attacker whose Call's Supremacy adds +50% damage against Flying enemies. He costs 2,000 Yen to deploy, and an economy-heavy team helps fund his further development. His Hill classification and Flying bonus make him a focused choice for this role.
- Phoenix (Rebirth): A Ground Magic/Blaze summon unit whose summons can attack Flying enemies. Keep that summon role in mind when replacing him in the beginner loadout.
- Useless Goddess: A Hybrid support that helps the Magic core. For a slot dedicated to Flying damage, choose an attacker whose damage and placement suit the stage.
- Beyond Heaven: A Hybrid option with True damage and a Limited tag, useful when it is already in your collection.
- Coyote (Number One): Build around his Ground configuration. Apply the Ground multiplier when planning his Flying coverage.
Check each attacker's current placement type and choose a position that covers the Flying route. The combat mechanics guide explains placement, targeting and attack coverage.
Burn teams and unit details
For a Burn-focused composition, combine Burn application with support that strengthens or extends it. Follow the Burn team synergy guide for Eskanoor, Flame and Goju positioning and their specific conditions.
Use the unit directory to compare forms, abilities and deployment types. Once you have identified a missing team role, the summoning guide explains banner selection, costs and pity.
Choose a tier list for the task
Open Wiki → Tier List from the lobby, then choose the category that matches your goal.
- Overall: Broad priorities across damage, support and control roles.
- Infinite: Choices for long runs.
- Elements: Choices organized around an element.
- Fan Lists: Named player rankings. Use Top, New or Yours, then open the list you want to inspect.
Select or hover a unit card to inspect its details. Use the list's mode and role alongside deployment cost, damage compatibility and the gaps in your team when deciding what to develop next.