Anime Crusaders X Settings and Controls
Customize your HUD, rebind controls and save automatic unit abilities in Anime Crusaders X. Use the display and audio options to keep the information you need easy to follow during a match.
Open Settings and search for an option across categories. Use Interface for HUD layouts, Units for saved automatic abilities and Keybinds for controls. On a selected unit, Z cycles auto-upgrade priorities from P1 through P6 to Off; N performs the instant Auto upgrade action. To restore overhead enemy health bars, turn off Click-Only Enemy Health under Optimisations.
Find settings and customize the HUD
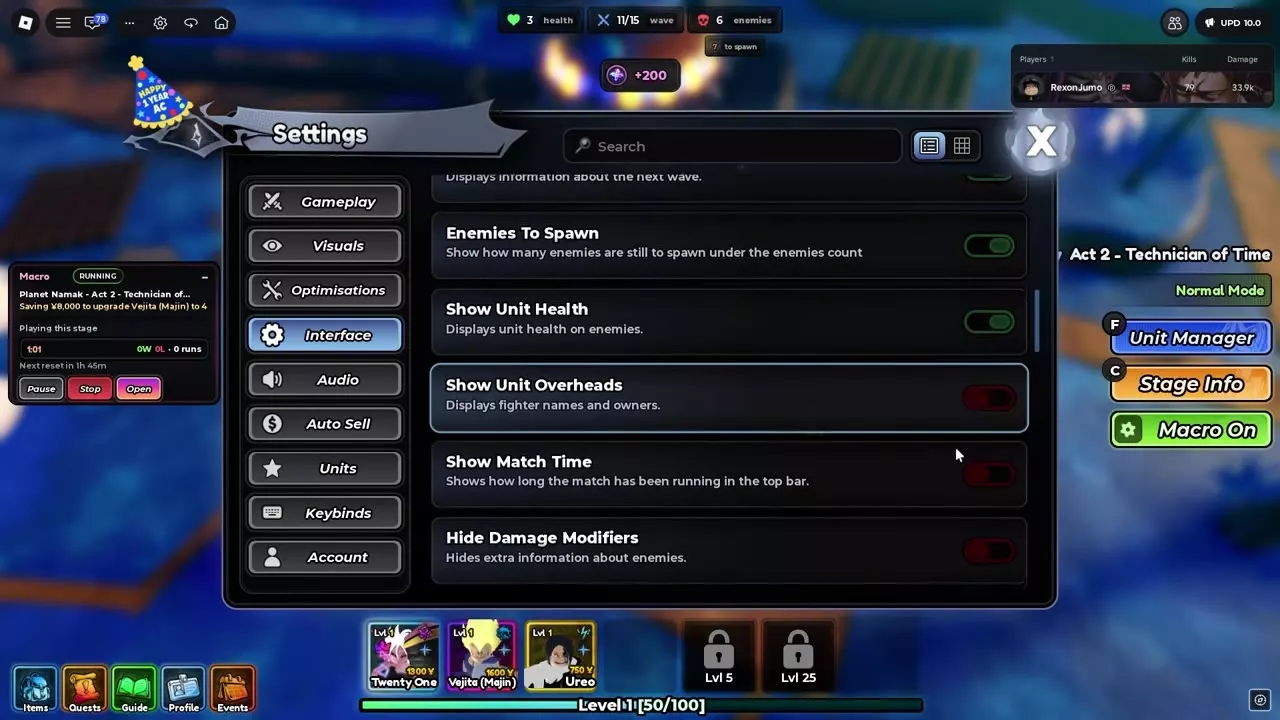
Open Settings, then use the search box to find an option across categories. The category list includes Gameplay, Visuals, Optimisations, Interface, Audio, Auto Sell, Units, Keybinds and Account. A view toggle switches between list and grid views.
HUD size, buttons and currencies
- Open Interface > UI Scale and adjust the interface size. Use the slider's Reset button to restore that setting.
- Configure HUD Buttons separately for the lobby and matches.
- Choose Classic or Compact under Lobby HUD Layout.
- Use Displayed Currencies to choose the currencies on the lobby bar. Hold and drag a currency to change its position.
Hiding a HUD button leaves its keybind usable. Hide less-used buttons when you want more screen space while keeping keyboard access.
Match information
Choose the information that helps you read the current run:
| Setting | Display |
|---|---|
| Show FPS | Frame rate |
| Show Match Time | Elapsed match time |
| Display Path Visualizers | Enemy routes |
| Show Paths Info | Route information |
| Display Next Wave Info | Upcoming wave information |
| Enemies To Spawn | Remaining unspawned enemies |
| Show Unit Overheads | Fighter names and owners |
| Hide Damage Modifiers | Hides extra enemy information |
The top bar also supports a clock display. HUD Animations and Wave Pop-up have separate settings, so you can adjust interface motion without treating them as one switch.
Upgrade window and confirmations
Open the upgrade window's Layout editor to move, resize and rotate its parts. Choose Simple Upgrade Window for a simpler panel. Turn off Show Upgrade UI on Left to open the window above the selected unit instead.
Supported color settings use a color wheel. Settings also lets you require confirmation before selling through Unit Manager and skip the Gold Shop's Buy All confirmation.
Keybinds and match controls
Open Settings > Keybinds to select a preset or rebind individual actions. More than 60 actions are supported, including targeting priorities such as First, Strongest and Bosses. Bind priorities you switch between during combat; see targeting and attack coverage for how targeting affects attacks.
Upgrade shortcuts
| Action | Control |
|---|---|
| Cycle auto-upgrade priority | Z or unit Auto button |
| Instant Auto upgrade | N |
| Placement actions | Place, Cancel, Rotate, Quick Place |
Select a deployed unit and press Z, or click its Auto button, to cycle P1 → P2 → P3 → P4 → P5 → P6 → Off. N performs the separate instant Auto upgrade action.
Gameplay settings also include options to upgrade the cheapest unit first and automatically sell farm units.
Ordinary match automation
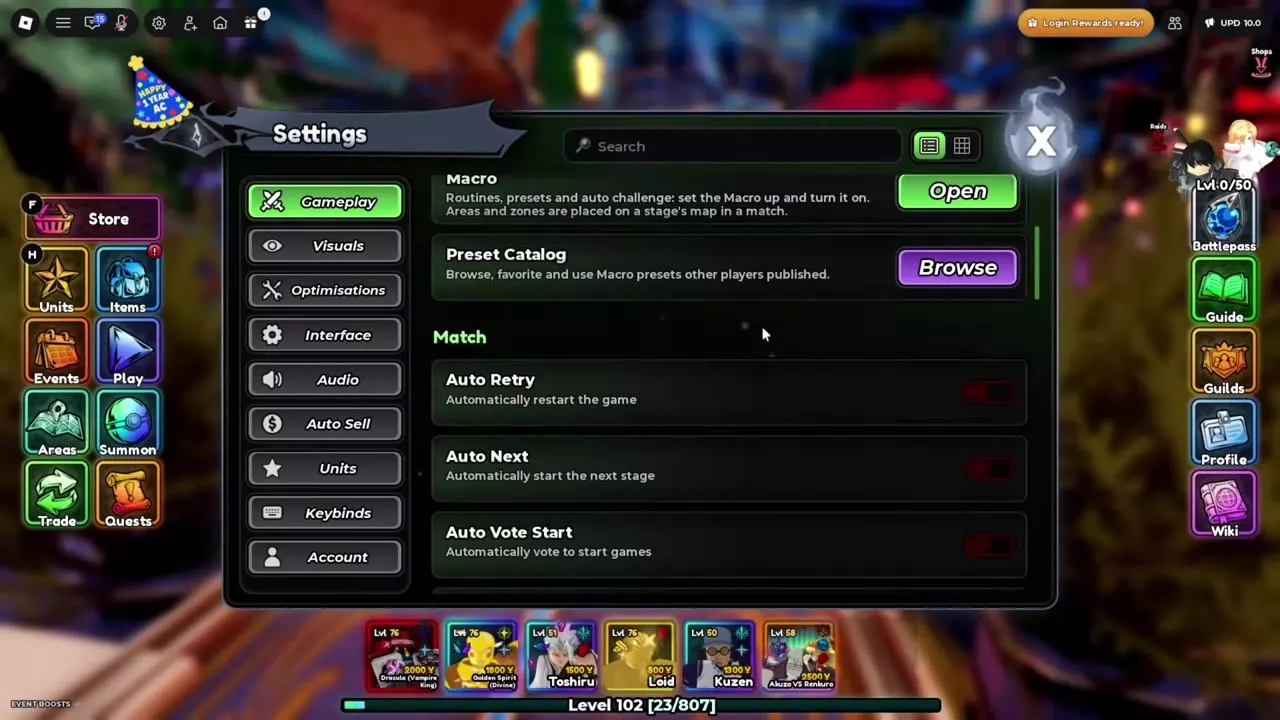
Open Settings > Gameplay and find the Match options:
- Auto Retry automatically restarts the game.
- Auto Next automatically starts the next stage.
- Auto Vote Start automatically votes to begin.
- Show Match End Rewards controls the reward display at the end of a match.
To automate wave skipping, open the Skip Wave vote window and check Auto-skip waves. Enabling it produces a Setting Changed notification. In a solo match, submitting the skip vote changes the counter from 0/1 to 1/1, displays Voted and advances the wave.
Teleport and end-match actions
- Teleport To Spawn returns you to the current map's spawn. Use it when your character is stuck.
- Teleport to Lobby returns you to the lobby.
- Force End the Game immediately ends the match as a defeat.
- Remove All Pinned Quests clears every pinned quest.
The separate End Match vote is available from any wave in Boss Lair and from wave 2 in other modes.
Automatic unit abilities
Use Settings > Units to save a unit's automatic ability behavior across matches.
- Search for the unit you want to configure.
- Open its entry and read the ability tooltip.
- Choose the supported automatic behavior. The selection carries over to later matches.
The tab supports more than 20 units. Searchable entries include Goju VS Sukuno, Beyond Heaven and Sun God VS Dragon, along with these named options:
| Unit | Option label |
|---|---|
| Goko & Vejita | Fusion |
| Hikari | Jackpot |
| Freeran | Timeless Mage |
| Rain | Heavy |
| Music | Artist |
| Barusu | From Zero |
| Hesia | Sacred Flame |
| Nagu | Blade Trickster |
| Call | ULTRA PERFECT |
| Zen | Unbound |
| Psycho | ???? |
| Virgile | Azure Storm |
| Kashymu | God of Lightning |
| Kanpechi | Born for Battle |
| Zero | True Emperor |
Zero's Auto Pieces targets
Open Zero (True Emperor) > Auto Pieces. Queen, Knight and Pawn each have an independent target: Off or a team slot from 1–6. Select the slot containing the intended recipient for each piece.
For assignment conditions and chess-piece effects, use Zero (True Emperor).
Health bars, minimap and pings
Show enemy health bars
- Open Settings and search for enemy he.
- Find Click-Only Enemy Health under Optimisations and turn it off.
- Close Settings to read health bars above enemies.
Show Unit Health in Interface controls the enemy-health display. With Click-Only Enemy Health enabled, click an enemy to read its health at the top of the screen instead of drawing overhead bars. Keep that mode enabled when reducing health-bar drawing work during large waves matters more than seeing every bar at once.
Customize the minimap
The minimap displays paths, enemies and your units, with warnings when enemies approach the base. Route lines show paths, circular markers identify units and a heart-shaped marker identifies the objective.
Open Settings > Interface > Minimap Editor, including from the lobby. Use its live preview to adjust the style, shape, colors, markers, size and position. Browse Presets, Frame, Map, Paths, Enemies and Players for the relevant controls.
Preset groups are Classic, Realistic and Art. Realistic offers Satellite, Vivid, Golden Hour, Sunset, Overcast, Night, Moonlight, Winter, Autumn, Desert, Tropical, Misty, Lens, Bare Photo and Ultra HD.
Use Test Flash to preview the warning flash. The editor also provides Undo My Changes, Reset Everything, My Code, a style-code input and Apply. To apply a style code, paste it into the input and select Apply.
During a match, use the minimap's zoom-in, zoom-out and hide controls. Choose the visibility setting according to the result you want:
| Setting | Effect |
|---|---|
| Show Minimap | Controls match visibility |
| Turn Off Minimap | Stops minimap operation |
Show Minimap also has a separate toggle button and keybind, and its visibility choice persists between matches. Turn Off Minimap stops the minimap from running in matches and removes its toggle button. Use Show Minimap when you want to hide and reopen it during play.
Ping a location or request a unit
- Open the Ping panel at the intended location.
- Choose Ping This Spot to mark the position, or select a teammate and one of their units to request that placement.
- Read the light-column marker, player name and unit card to identify the request.
The panel displays V — Spot and Q — Cancel.
When receiving a placement request, click its ping to place the requested unit at that position. Successful placement displays Unit placed and still charges the unit's deployment cost. For example, placing Mely (Assault) through a request costs 2,000 Yen in the shown setup. A request communicates where and what to place; sending it does not place the unit for the recipient.
Visuals, audio and privacy
Unit models, outlines and effects
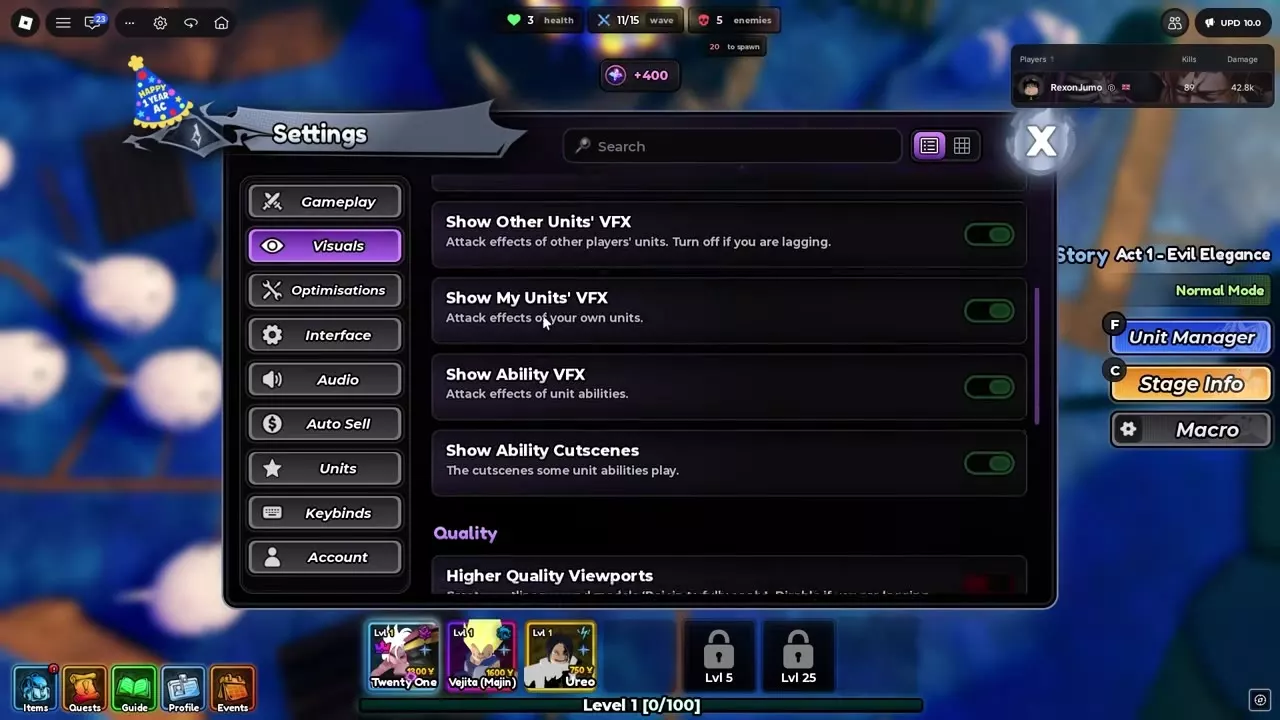
Open Settings > Visuals to adjust models and effects separately.
- Turn off Show Other Players' Units to hide their models while keeping their ground rings visible. Other Players' Unit Colour sets those rings using RGB; leaving it blank uses blue.
- Enable Outline Your Units for white outlines on your placed units. Outline Other Players' Units uses their ground-ring colors.
- Show Other Units' VFX controls other players' attack effects. Turn it off to reduce visual load while keeping your own effects visible.
- Show My Units' VFX controls your units' attack effects.
- Show Ability VFX controls ability effects, while Show Ability Cutscenes controls supported ability cinematics.
Camera shake has a separate off option, and unit hover cards can also be disabled. Lobby Time changes the lobby's time of day; Sunset and Night use skies with clouds.
Music and sound effects
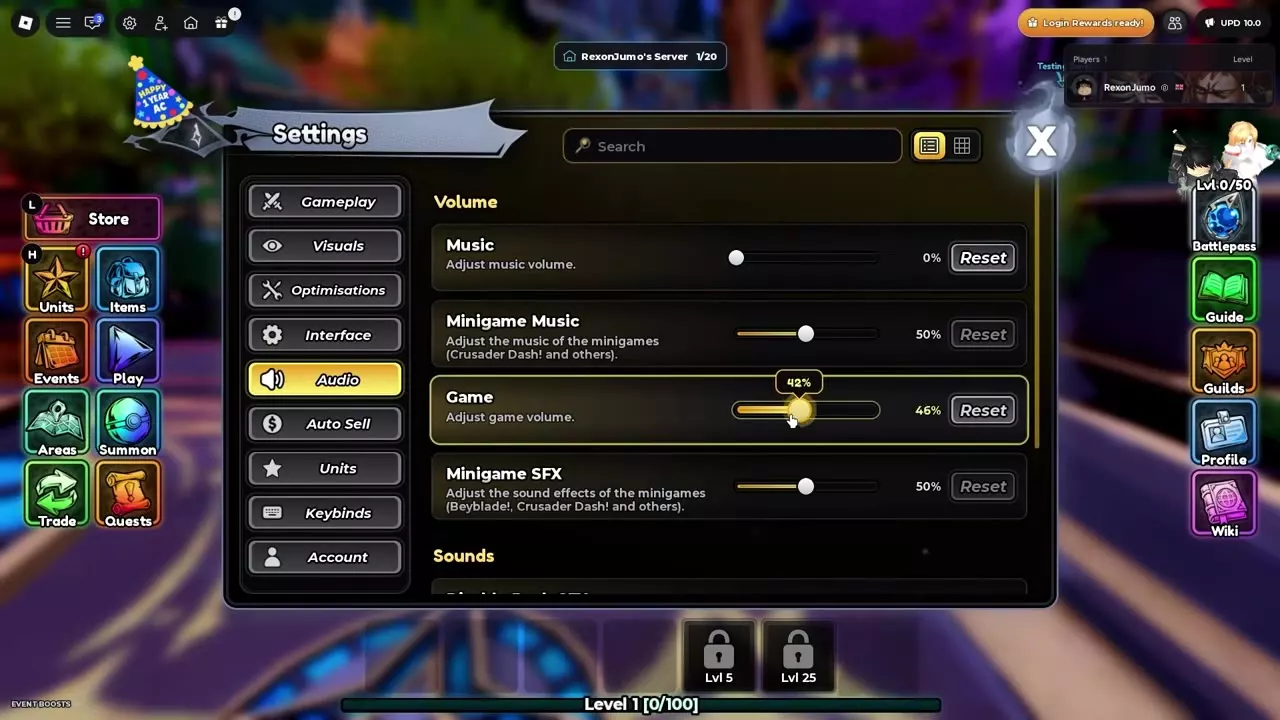
Open Settings > Audio and adjust the relevant slider. Each has its own Reset button.
| Slider | Audio category |
|---|---|
| Music | Main-game music |
| Minigame Music | Minigame music |
| Game | Main-game sound |
| Minigame SFX | Minigame sound effects |
Use Dash SFX, Yen SFX and Wave Start SFX to control dash sounds, Yen-gain sounds and new-wave sounds separately. Turn off Yen SFX to mute the sound played when gaining Yen without changing every audio category.
Account privacy
Open Settings > Account > Privacy and enable the restrictions you want:
- Disable Trade Requests blocks incoming trade requests.
- Hide Your Profile prevents other players from viewing your profile.
- Hide Your Region hides the country or region flag beside your name.
- Disable Quick Profile turns off quick profile access.
- Disable Friend Joins blocks joining your lobby or spectating through Join Friend.
Performance and built-in Macro
For device presets, crowded-lobby settings and a saved custom optimization setup, follow the performance settings guide.
For automated deployment, routines, unit-slot behavior and challenges, open Settings > Gameplay > Macro > Open and follow the built-in Macro guide. Preset Catalog > Browse opens published Macro presets. Auto Retry, Auto Next, wave skipping and saved unit abilities remain available through their individual settings.