
Anime Crusaders X The One Trial Guide
The One is a 150-wave Hard trial in Liones Kingdom that supplies your team and rewards Eskanoor. Build coverage around the free Hero, support him through the day-and-night cycle, and use his suns to overcome enemy survival conditions.
Place the supplied Eskanoor at a route intersection, add slow and time-stop support, and limit wave skipping to avoid its 1% damage penalty per skipped wave. Keep a sun active against Undead King, save Unleash for Demon King's Purgatory phase, and finish Twilight with a sun. Clearing the trial awards Eskanoor at 100%; Great Axe Rhitta has a 25% drop chance and four-clear pity.
Enter The One and prepare the supplied team
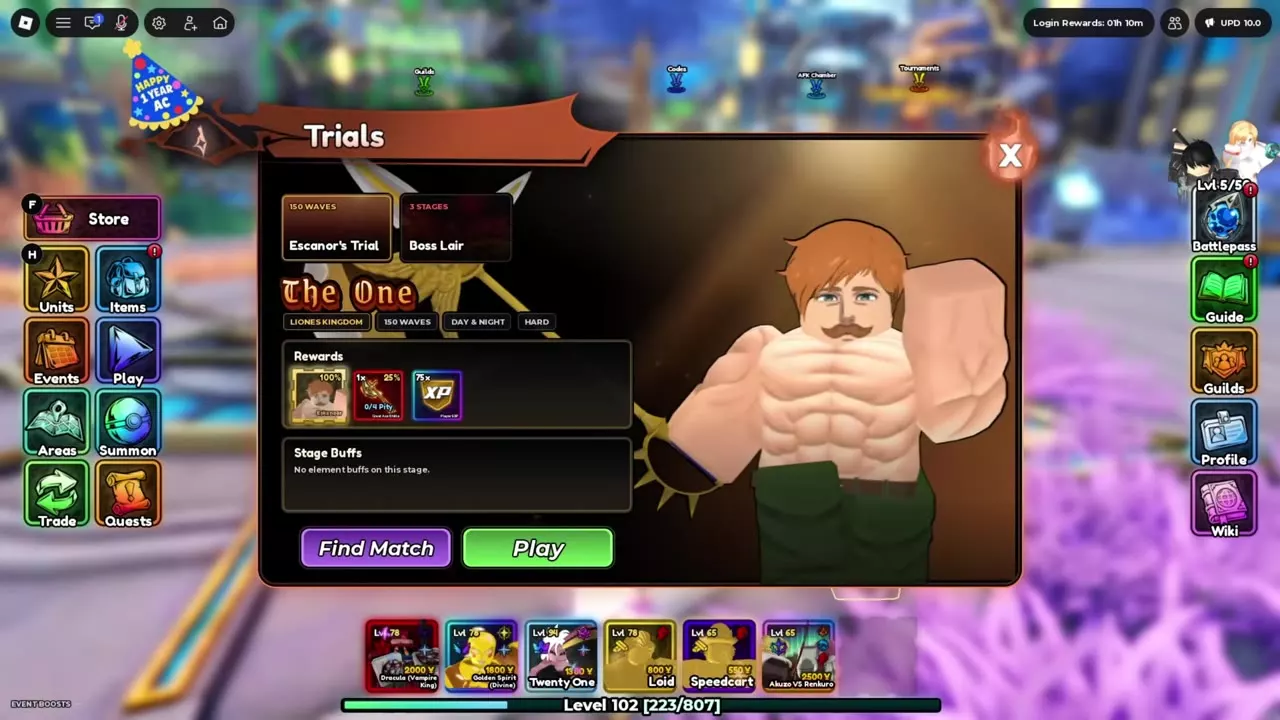
- Find Escanor behind the counter in the green room in the lobby. Approach him, press E, and choose Trials.
- Select Escanor's Trial: The One. It takes place in Liones Kingdom on Hard, with 150 waves, Day & Night, and no elemental stage buffs.
- Choose Find Match to search for players, or Play to enter the waiting room. The room holds up to six players; use Start to enter or Cancel to back out.
- On the map, vote with Start Game. A solo vote passes at 1/1.
The trial supplies its own team, including Eskanoor for 0 Yen. His sell button is locked, so choose his initial position carefully. Completing the trial awards Eskanoor at 100%, plus a 25% chance for one Great Axe Rhitta with four-clear pity. The reward list also includes 75 EXP.
Use the Boar Hat Shop
Use the Boar Hat Shop in the right battle sidebar. Its resource counter is separate from the Yen used to deploy and upgrade ordinary units.
The item directory lists Ale, Sun Shard and Holy Water prices. The shop also offers Reroll for 60 shop currency.
Buy Sun Shard to upgrade the supplied Eskanoor. Choose Reroll when replacing your current Pride Draft upgrade better addresses the next threat. Reroll reopens the draft and replaces the named existing choice with your new selection; successive choices do not accumulate through rerolling. Read the replacement notification before voting so you know which bonus you are giving up.
3 objects
| Name | Price |
|---|---|
|
40 shop currency
| |
| |
|
120 shop currency
| |
| |
|
50 shop currency
| |
| |
Build opening coverage and support
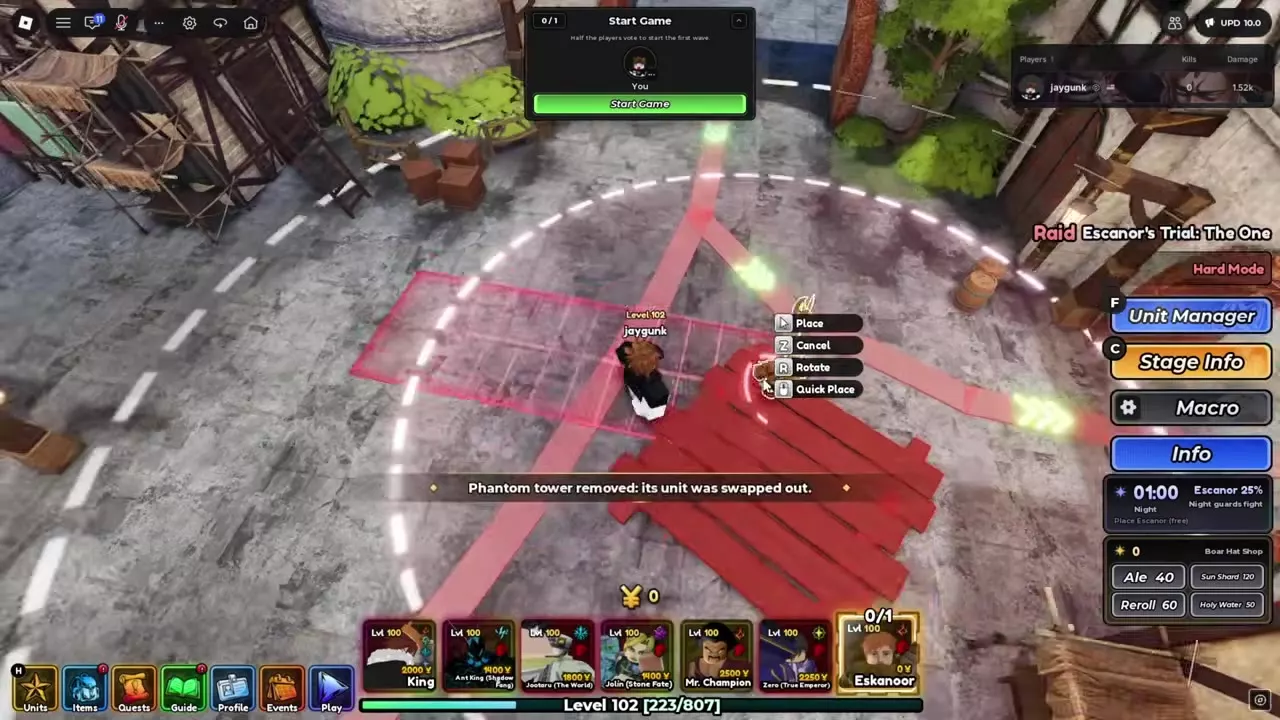
- Place Eskanoor near a route intersection. Use his range preview to cover multiple approaches, then put additional coverage farther along the route to catch enemies that pass him.
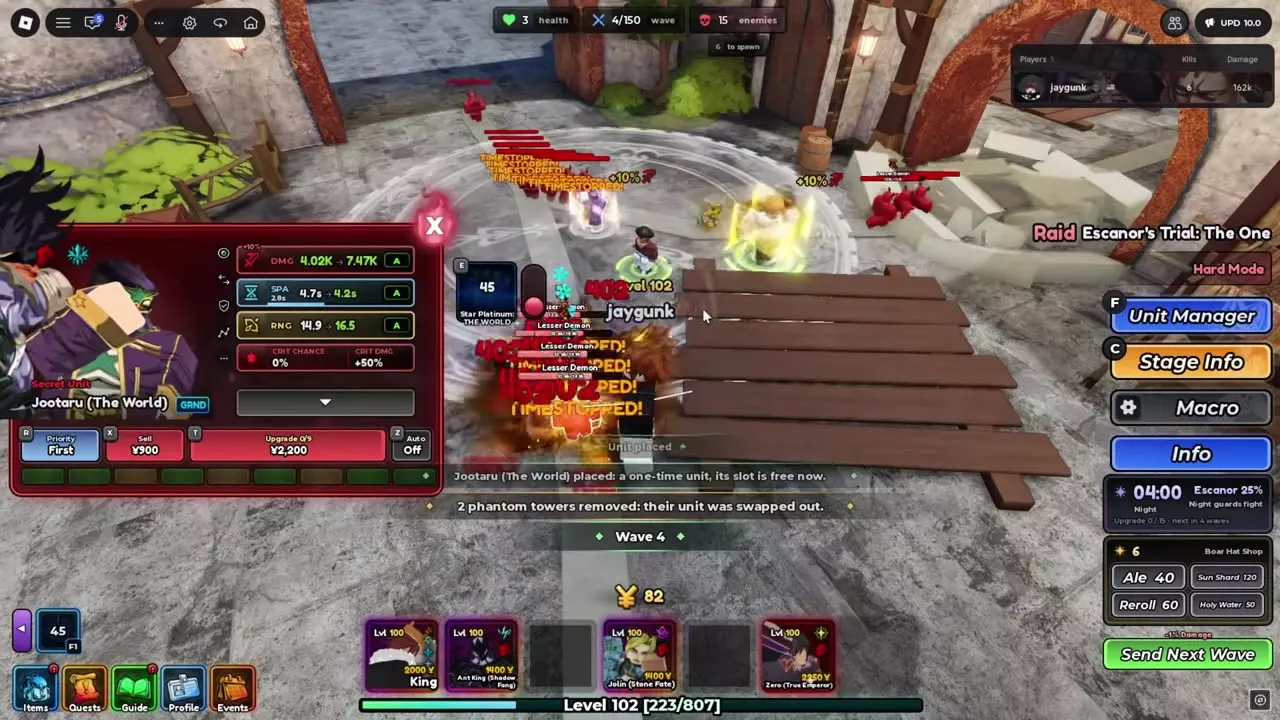
- Establish control before spending heavily on support. Jolin (Stone Fate) slows enemies. Deploy Jootaru (The World) for 1,800 Yen and use Star Platinum: THE WORLD when enemies build up beyond Eskanoor's attacks.
- Add Mr. Champion within support range. He costs 2,500 Yen; upgrade him to strengthen World Champion's Aura and support Eskanoor's physical damage. Prioritize a functioning opening defense before committing this money.
- Assign Zero's Queen to Eskanoor. Deploy Zero (True Emperor) for 2,250 Yen, open Command, choose Queen, select Eskanoor, and confirm Yes. Queen provides +20% range and −10% cooldown, improving coverage and attack frequency.
- Make room for reinforcements. Deploy the remaining copies of a hotbar unit or place a one-time unit to release its slot. Jootaru, Jolin and Mr. Champion free their trial hotbar slots after placement. Reinforcements such as Mely wait while every slot is occupied; deploy and upgrade arriving Bun, Mely and Mely (Assault) as the defense grows.
Zero's alternatives serve different needs: Knight grants the selected unit +20% damage. Pawn grants +5% damage, −5% cooldown and +5% range; after that unit defeats 50 enemies, Pawn becomes Queen and grants Queen's effects for 15 seconds. Queen is the direct choice when Eskanoor needs sustained reach and faster attacks.
Queue placements and upgrades
Use Phantom placement when you lack Yen. The queued unit is purchased when you reach its required amount. Cancel an unwanted Phantom through Unit Manager before it spends your money. Replacing its hotbar unit also removes that unit's pending Phantom towers.
Move the placement preview away from nearby units when spacing blocks deployment. When a Crusader placement restriction applies, respect its one-on-field limit. Hover an upgrade-bar tier to inspect its cost and attributes, then click it to upgrade directly to that tier. The combat guide explains these controls in more detail.
Mely (Assault) can switch between Full Counter and Demon King's Mandate through Swap Modes. Only one mode is active at a time, with a five-second switching cooldown. In Full Counter mode, he takes an impending stun for a unit within range at half duration, counters the attacker for 100% damage, and gains +50% damage for his next three attacks without stacking. With Full Counter active and a Ban holding 100 Greed within range, he also gains +50% damage until either condition ends.
Manage day, night and Sunlight
Watch the clock and Escanor strength panel on the right side of the screen. His strength rises toward noon, so enemy control and rear coverage matter especially during his weaker hours.
| Time | Period | Strength |
|---|---|---|
| 01:00–05:00 | Night | 25% |
| 06:00 | Sunrise | 60% |
| 07:00 | Morning | 90% |
| 08:00 | Morning | 120% |
| 09:00 | Morning | 160% |
| 10:00 | Day | 200% |
| 11:00 | Day | 250% |
| 12:00 | High Noon | 300% |
| 13:00 | Afternoon | 250% |
At 12:00 High Noon, press THE ONE when prompted. At 13:00, the strength panel drops to 250%, while an existing The One status can still have time remaining.
During Eclipse, Eskanoor fights at nighttime strength and his suns are disabled. Lean on the rest of the defense and its control skills during this event. Moonlit Pride raises nighttime strength from 25% to 50%; Eternal Noon instead gives 300% strength whenever at least one of Eskanoor's suns is active, regardless of day or night.
Kills generate Sunlight, and Golden Hour doubles Sunlight gained per kill. The supplied Eskanoor automatically upgrades every six waves; Sun Shard purchases provide another way to advance his trial upgrades.
Choose Pride Draft and Captain's Call
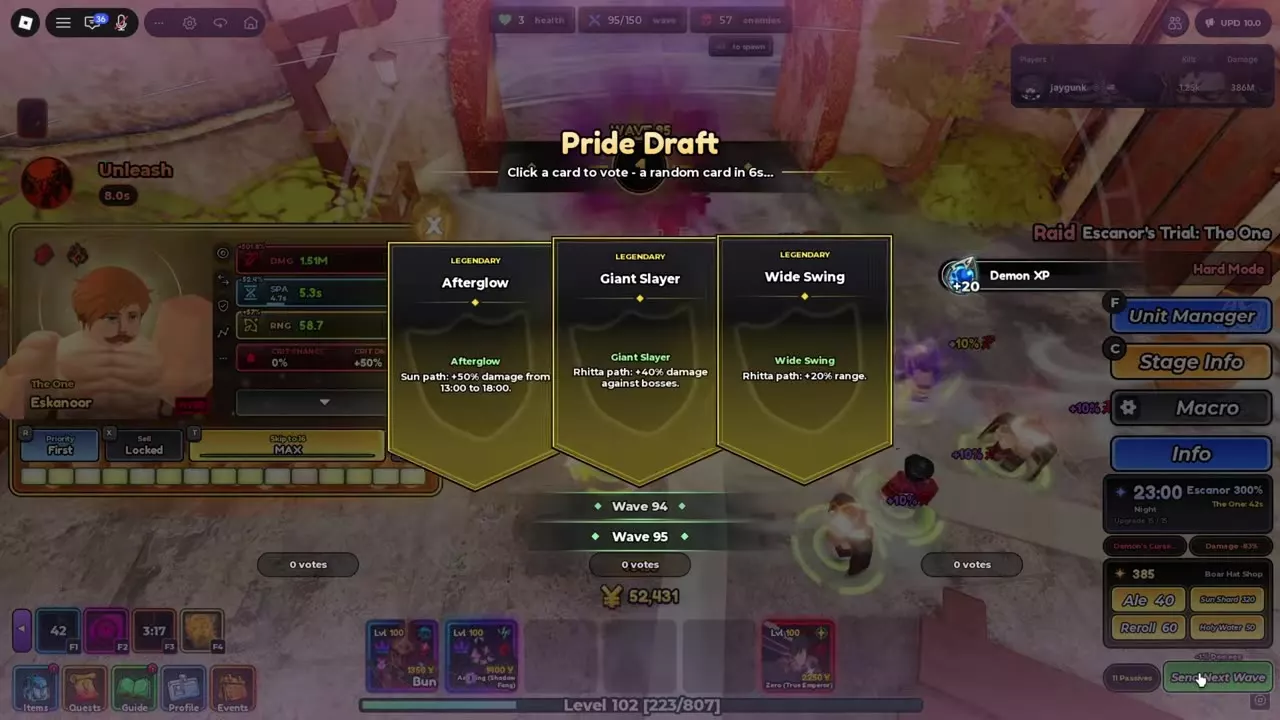
The first Pride Draft opens at wave 5. Click a card to vote before the countdown ends; a draft without votes resolves randomly.
Pride Draft cards
All twelve regular cards below are Legendary. Choose growth early enough to benefit from the remaining waves, then address the defense's immediate weakness.
| Path | Card | Effect | Limit or timing |
|---|---|---|---|
| Pride | Pride of the Lion | +2% damage per later wave | Up to +60% |
| Pride | Takedown Pride | +1% damage per 20 team kills | Up to +50% |
| Pride | Lion's Roar | +20% ally damage | Each ally |
| Pride | Arrogance | +60% Eskanoor damage | −15% ally damage |
| Sun | Morning Glory | +50% damage | 06:00–11:00 |
| Sun | Afterglow | +50% damage | 13:00–18:00 |
| Sun | Moonlit Pride | 50% nighttime strength | Replaces 25% |
| Sun | Solar Flare | Suns return 30% faster | Sun recovery |
| Rhitta | Heavy Rhitta | +30% damage | Immediate bonus |
| Rhitta | Quick Swing | +15% attack speed | Attack speed |
| Rhitta | Wide Swing | +20% range | Coverage |
| Rhitta | Giant Slayer | +40% boss damage | Bosses |
- Pride of the Lion is a strong early pick because later waves build its damage bonus. Takedown Pride grows through team kills.
- Giant Slayer targets the boss fights that gate completion. Heavy Rhitta supplies immediate damage against a broader set of enemies.
- Wide Swing helps Eskanoor reach more of the crossing and catch enemies farther along a route. Choose it when reach is the problem rather than raw damage.
- Arrogance concentrates power in Eskanoor while reducing allied output. Take it when he carries the defense; favor Lion's Roar when your developed allies contribute meaningful damage.
- Morning Glory and Afterglow are time-bound damage choices. Moonlit Pride strengthens the weak night period, while Solar Flare improves sun recovery.
Capstones
| Capstone | Effect | Condition |
|---|---|---|
| The One | +25% damage | Eskanoor and every ally |
| Eternal Noon | 300% noon strength | At least one active sun |
| Rhitta Unbound | +50% damage, +15% range | Damage and coverage |
Eternal Noon connects sun uptime directly to Eskanoor's strength through both day and night. Rhitta Unbound combines a large damage increase with extra reach; The One strengthens Eskanoor and the whole allied defense.
Captain's Call
Click a promotion card to vote, then read the Picked notification. Each promotion grants Crusader to every matching unit for the rest of the run.
| Promotion | Applies to | Duration |
|---|---|---|
| Promote King | Every King | Rest of run |
| Promote Ant King | Every Ant King (Shadow Fang) | Rest of run |
| Promote Mely | Every Mely | Rest of run |
| Promote Mely (Assault) | Every Mely (Assault) | Rest of run |
Choose the type already contributing to your defense, especially one you have deployed and upgraded. A promotion strengthens its named type; it does not grant the trait to every unit in the team.
Defeat Fox Bun and Undead King
Wave 30: Fox Bun
Keep attacking Fox Bun while he steals 4% of each player's Yen every 10 seconds. When he falls, he returns all stolen Yen with 50% extra.
Have at least one of Eskanoor's suns active when Fox Bun first falls. Without an active sun, he revives with 40% health. Timing the sun prevents that revival and avoids another stretch of fighting.
Fox Raid thieves use a different theft rate: each thief steals 3% of each player's Yen per second. Defeat them to recover the stolen Yen with a 50% bonus. Clear these thieves promptly to restore money for deployments and upgrades.
Wave 100: Undead King
Undead King's Lord of the Night reduces damage taken by 60% whenever no Eskanoor sun is active.
- Activate a sun before committing your main damage.
- Keep a sun active to remove the no-sun damage-reduction condition.
- Use Jootaru's time stop to hold the advancing enemy group while your defense attacks.
- Combine Cruel Sun with Eskanoor's damage and range boosts when needed. Plan any Unleash use around its long cooldown and the upcoming final boss.
Finish Demon King's three phases
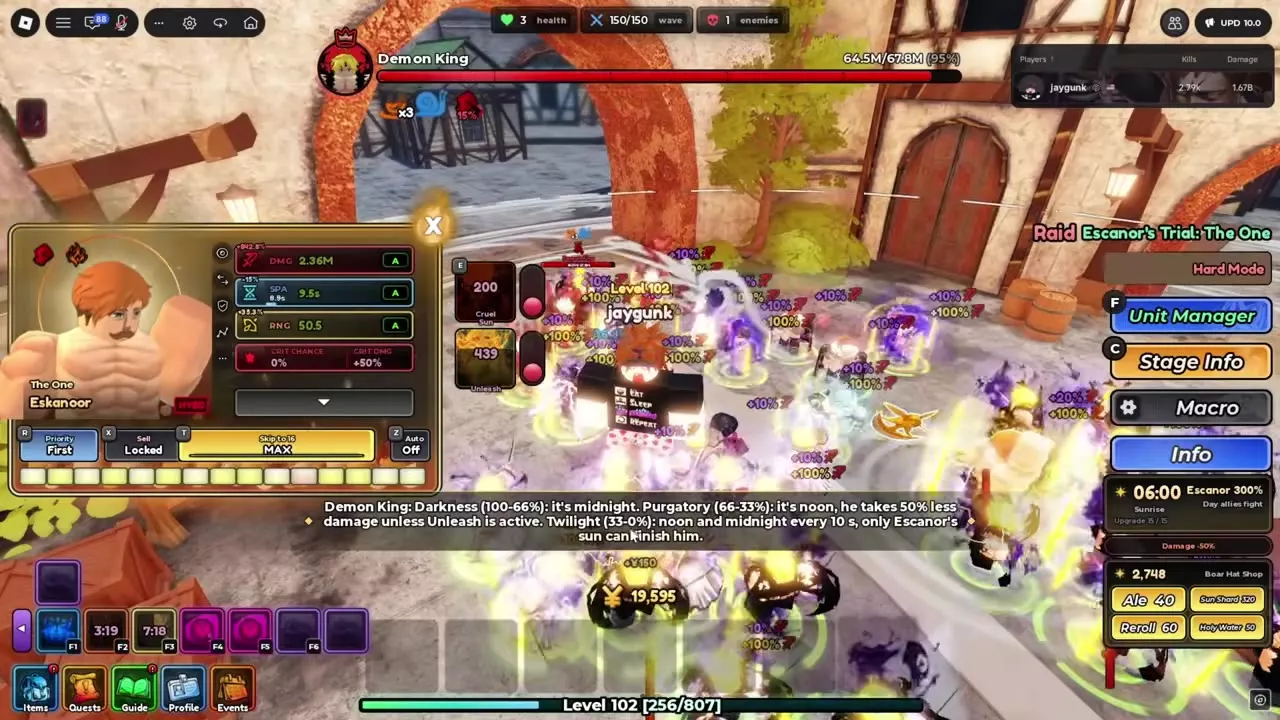
Demon King arrives at wave 150. Respond to his remaining health rather than using every ability as soon as it becomes available.
| Phase | Remaining HP | Time rule | Key condition |
|---|---|---|---|
| Darkness | 100%–66% | Midnight | Fight through night |
| Purgatory | 66%–33% | Noon | Unleash removes 50% reduction |
| Twilight | 33%–0% | Noon/midnight every 10s | Sun finishing hit |
- Fight through Darkness. This phase sets the time to midnight. Keep the supporting defense active while bringing Demon King toward the next health threshold.
- Activate Unleash during Purgatory. The phase sets the time to noon, but Demon King takes 50% less damage unless Unleash is active. Save the ability for this reduction rather than spending it casually before the fight.
- Pair Unleash with Rising Sun or Cruel Sun. While Unleash is active, their duration becomes one second and their explosion damage increases by 100%.
- Finish Twilight with Eskanoor's sun. Noon and midnight alternate every 10 seconds. Continue attacking through the switches, then land the required sun finishing hit; ordinary damage alone cannot finish Demon King.
Plan the long cooldowns
Unleash lasts 55 seconds and has a 660-second global cooldown. Its timing is central to Purgatory, so spending it against Undead King can leave it unavailable for the final fight.
Cruel Sun normally lasts 40 seconds, then explodes for 500% damage, with a 200-second global cooldown per player. Unleash changes its duration and explosion damage as described above. Keep the final sun requirement in mind when planning both abilities.
Stop damage loss and enemy survival conditions
Limit Send Next Wave
Each skipped wave carries a 1% damage penalty and immediately adds another wave of enemies. Avoid repeatedly pressing Send Next Wave to rush drafts or automatic upgrades: reduced damage and overlapping enemy groups undermine the same defense you are trying to grow. An attempt that skipped more than 100 waves reached nearly zero Eskanoor damage and failed at wave 111.
Keep a sun active during Demon's Curse
During Demon's Curse, enemies can die only while at least one of Eskanoor's suns exists. His suns have no cooldown during the curse. Activate a sun when enemies survive your attacks, then maintain sun presence while clearing the group.
Finish Mini Meliodas outside Full Counter
Only Eskanoor's sun can finish Mini Meliodas. His Full Counter grants immunity for three seconds every 15 seconds. Time the finishing attack outside that immunity window. Eskanoor's sun has no cooldown while Mini Meliodas is present.
Use the Solar Flare event
The Solar Flare wave event increases damage taken by every enemy by 30% while its timer is active. This event is separate from the Solar Flare draft card, which makes Eskanoor's suns return faster.
Claim rewards or restart
After the final clear, press Space to skip the Eskanoor cutscene if desired, then collect the victory rewards. Choose Return to Lobby to leave or Replay for another run.
If an opening deployment mistake warrants starting over:
- Open Settings → Gameplay.
- Open Restart Stage.
- Choose Restart to confirm, or Cancel to keep playing.
Confirming Restart removes the current run's units and progress and returns the trial to wave 1. Redeploy the supplied team before starting again.
Build your unlocked Hero
Open Units → Collection → Heroes, select Eskanoor, and choose Equip to use your unlocked Hero.
- Read Eskanoor's abilities and growth details to build around his attacks and suns.
- Compare Hero traits for his damage, Burn and team-support options.
- Compare relics before choosing equipment, including Great Axe Rhitta.